SLR Camera Settings
If you have an SLR camera, whether it be digital or not, you have the option to choose different settings with which to take your photos. This gives you much more control over how your pictures turn out.
However, a lot of people buy a good camera and then just use it on the automatic setting so that the camera itself decides what speed and what aperture the lens will fire at. It may also choose the ISO setting for that shot. It is very easy just to keep using the camera on the automatic setting and you can get perfectly good shots by doing this, but if you want to be a bit more inventive with your photography then you need to take that step to learn how to use the manual settings.
So, if you want more control over how your pictures turn out, and you want your pictures to look more professional, then try experimenting with the different settings. The best idea is to actually read the instruction booklet that came with your camera but some of those are hundreds of pages long and realistically how many people do that?
So, there are some different settings on your camera – you may have the picture icons which will customise the kind of settings that you might use – for example if you choose the sport option you will get a faster shutter speed at the expense of depth of field and it may also automatically turn on the multi-frame option.
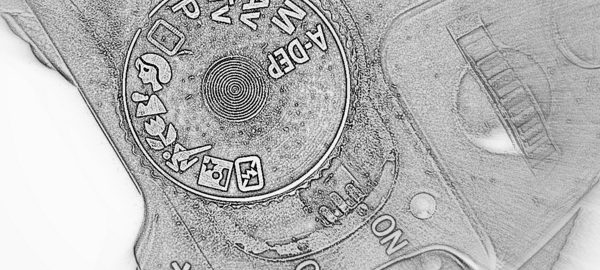
Otherwise you may have the following setttings:
Av – Aperture priority – where you choose the width of the aperture (this controls the depth of field)
Tv – Shutter priority – where you set the shutter speed and the camera chooses the aperture
M – Completely manual – you choose both settings which means that you need to make sure that you have the right combination that will let enough light in for the picture to be correctly exposed.
I will explain the first two options below.


Shutter Priority
With the shutter priority setting (Tv on the camera), you can choose the shutter speed yourself. The camera will then choose what is the relevant aperture for the light conditions.
To explain further, let’s say you choose a shutter speed of 1/200th of a second. Now depending on how much light there is the camera may then set the aperture to f5.6 or even f18 if it is a bright and sunny day. By choosing to preset the shutter speed, for example, on a fast speed, you can catch action that otherwise might be blurred by the automatic setting. Also, you might have a low light level and want to set the shutter speed to something quite slow – perhaps you are using a tripod and want a shutter speed of 1/8th of a second – you can do this on shutter priority.
One thing that you have to watch out for though is to check that you have enough light or there isn’t too much light. For example, if you set the shutter speed at 1/200th of a second in low light, then even if the camera opens the aperture as wide as possible there still may not be enough light for the picture. You will then end up with a very dark, or even black picture, so be sure to check that the aperture setting is not flashing or giving an error when you look through the viewfinder.
And at the other end of the scale, if you set a slow shutter speed, and the camera chooses the narrowest aperture to stop so much light coming in, but there is still too much light, then you will end up with an over-exposed picture (it will look pretty bleached out). So make sure the speed you set allows for the atmospheric conditions.
One thing you can also do to compensate if the light is wrong for your settings, is to adjust the ISO. If for example you are taking pictures indoors where the light is poor but you don’t want to use a flash (I do this often when photographing my paintings) then you might need some extra leeway with the light. In this case, change the ISA setting up to anything around 1600 and this will enable you to take photos at a higher shutter speed so that you do not get camera shake.

Aperture Priority
With aperture priority you will basically choose what aperture you want the camera to take pictures at. Aperture is the narrowing or widening of the lens and the effect of changing the aperture is to let more or less light in to the camera. For example, and aperture of f1.8 is very wide and opens up the lens to more light. An aperture of f18 is very narrow and lets little light in.
The main effect that you might want to use an aperture setting for is to control the depth of field. Depth of field is how much of the photograph is in focus. The wider the aperture, the shorter the depth of field. So if for example you want a picture of some flowers in the field with the background being blurred then you need to use a wide aperture (i.e. the lowest f number you can with the light). If you use a narrow aperture then much more of the picture will be in focus.
It does also depend on how far away from your subject that you are – if the flowers are very close and the back of the field is a long way away you will get a better effect with a narrow depth of focus.
Once again check that the light is OK for you to use your selected aperture or you will ned up with an under or over-exposed photograph.
Depth of Field
Depth of field is one of the key things that you can use to make your pictures look professional – it is how much of the picture that is in focus from the front to the back. If you want to have a narrow depth of field (only a small part of the picture in focus and the rest blurred, for example the background) then you need to have a wide aperture, for example on a lens where you can manually set the aperture, for minimum depth of field you would set it at the smallest setting e.g. f1.8. If you wanted the whole picture to be in focus then you would set the aperture at say f16.
Using a narrow aperture on the foreground and making the background blurred can be a really good way of making a better picture.