Category Archives: Computers & Electronics

Where Can I Get a Waterproof iPod?

So I have recently taken up swimming as a great form of exercise both to keep fit and also to keep my back flexible and stop my back pain. I am not a great swimmer but I can keep going for a bit doing breaststroke and although that is not as good as doing front crawl I’m sure the swimming helps as part of my exercise regime.

However, the more I swim and the more lengths I do, the slightly more boring the swimming gets so I decided to see if I could get a waterproof iPod or some kind of music device to help stop the boredom and keep me swimming for longer.

I am a big music fan and I find that it helps in the gym, particularly on the treadmill to make the time go quicker. However, my everyday iPod will was obviously not going to be any good for swimming and so I had a look for a waterproof iPod, as I wasn’t sure if there was one, and found that there was indeed such a thing.

Actually there are two options for getting music in your ears while you swim and one is to buy a custom waterproof iPod or MP3 player and the other is to buy a waterproof case for your existing iPod or MP3 player. There are companies that take standard iPod shuffles and waterproof them with a 2 year guarantee.

Waterproof iPods

Waterproof iPod Shuffle options
 

Obviously there are pros and cons to each and it is a personal decision as to which one will be better for you but I would suggest the following:

If you are a frequent swimmer then maybe a waterproof iPod would be better then you don’t need to keep taking your iPod out of the waterproof case and also you can load up some songs that are perfect for swimming to. You can also get hold of a smaller iPod shuffle that is easy to attach when you are in the pool.

Waterproof MP3s can also be used in snow and for other watersports and not only for swimming. In fact obviously you can use them whenever but they are designed to work in water so you might as well use them for that!

The iPod can be attached to your goggles and you will also need waterproof headphones or earbuds to go with it. A waterproof iPod can also be used just like a normal iPod.

Waterproof Cases

If you just want to waterproof your iPod for going on holiday then think about getting a waterproof case, there are plenty available and the majority of these are cheaper than buying a waterproof ipod or MP3 player so you don’t have to shell out a lot of money.

You can also just get waterproof cases that will protect your iPhone or other smartphone for when you are at the pool or the beach so that your phone doesn’t get damaged by water.

However, if you are planning to swim with music then it is probably better to get something much smaller and easier to use than using your iPod or iPhone.
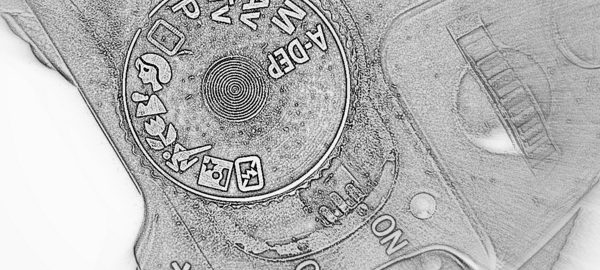
 

How To Use Manual Settings On A Digital Camera

SLR Camera Settings

If you have an SLR camera, whether it be digital or not, you have the option to choose different settings with which to take your photos. This gives you much more control over how your pictures turn out.

However, a lot of people buy a good camera and then just use it on the automatic setting so that the camera itself decides what speed and what aperture the lens will fire at. It may also choose the ISO setting for that shot. It is very easy just to keep using the camera on the automatic setting and you can get perfectly good shots by doing this, but if you want to be a bit more inventive with your photography then you need to take that step to learn how to use the manual settings.

So, if you want more control over how your pictures turn out, and you want your pictures to look more professional, then try experimenting with the different settings. The best idea is to actually read the instruction booklet that came with your camera but some of those are hundreds of pages long and realistically how many people do that?

So, there are some different settings on your camera – you may have the picture icons which will customise the kind of settings that you might use – for example if you choose the sport option you will get a faster shutter speed at the expense of depth of field and it may also automatically turn on the multi-frame option.

Otherwise you may have the following setttings:

Av – Aperture priority – where you choose the width of the aperture (this controls the depth of field)
Tv – Shutter priority – where you set the shutter speed and the camera chooses the aperture
M – Completely manual – you choose both settings which means that you need to make sure that you have the right combination that will let enough light in for the picture to be correctly exposed.

I will explain the first two options below.

Continue reading How To Use Manual Settings On A Digital Camera

How to Create a Photo Silhouette

If you are wondering how you can create a photo silhouette with some free software then you could try using Google’s Picasa shoto software to get quite a good effect.

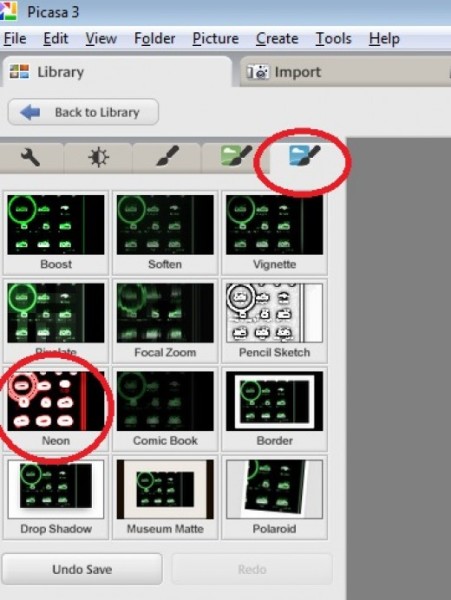
If you use the Neon effect tool in Picasa then this might give you what you are after. Using the Picasa Neon effect is simple and depending on how you use it you can get a silhouette effect or else you can have a level of detail in your photo. Personally I wanted to create a kind of chalk outline sketch effect which blanked out the features and just left an outline of the body. The good thing with this though is that you also get some of the internal lines of the image rather than just having a plain black silhouette.

You can get a good silhouette effect using Picasa's neon tool
You can get a good silhouette effect using Picasa’s neon tool

How to Create This Effect

silhouette1To create this effect firstly open the photo you want to edit in Picasa. Although Picasa does create a backup of your photo itself, you may want to create a copy so that you can play around with that and not worry about messing up the original.

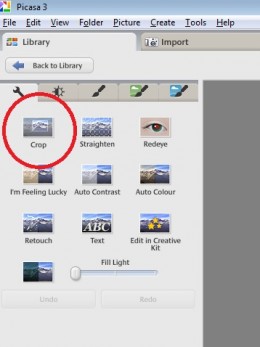
The first thing that I do is to crop the image to how I want it to look. The crop tool is on the first edit page and you can choose what format you want to use to crop the image to: you could keep the image in the same ratio as the photo was taken or you can just crop it manually to a size that you want.


Using the Neon Effect

The Neon Effect icon is on the last page of the edit icons. I actually first used the black and white tool to change my photo to black and white before using the neon tool. In this way the colour I chose in the neon tool would not be clouded by any other colours in the picture.

With the neon effect you have two decisions to make:

  1. firstly, the colour that you want to use for your neon effect. You can choose any colour you like with the drop picker. and you can choose how dark or light you want the colour to be.
  2. secondly, how much fade you want to apply to the picture. The less fade you apply, the more the rest of the picture will be dark and you will just have highlighted areas. The picture on the right (and the one at the top) have no fade applied to them so that they appear more as monochromatic pictures or a silhouette as per the top one.

silhouette2

Other Picasa Tools

There are many tools you can get in Picasa that you pay for in other software, it really is pretty versatile. Obviously it doesn’t come close to tools like PhotoShop that you may need if you are doing detailed changes to images but for the everyday photographer it has almost everything that you need.

I find the crop tool is one of the most useful and also the fill light tool for those photos that come out a bit dark due to lack of light. You can also use the ‘I’m Feeling Lucky’ button which sometimes can be a bit hit and miss but other times can give you a quick good result!

If you do use the fill light tool then it can also be good to add a bit more contrast. You are pretty much in charge of what you want to do and can cancel and undo any of the changes you have made if you do something wrong.

How Do I Back Up My Computer?

I think a lot of people live in a world where they know the chances of their computer crashing are significant and yet they still put off backing up their data. I think in most cases this is due to their lack of knowledge of how easy it can be to back up your data. I know people who occasionally add the files in their documents folder onto a CD or thumb drive but it is not very frequent and chances are if their laptop or PC were to fail they would lose data for sure.

I myself have had no less than 1 PC and 2 Laptops die on me completely, without a hope of recovery, in the last 3 years. The first laptop died due to someone else trying to fix something by removing the operating system and not being able to replace it. I stupidly had not backed up my data before allowing them to do this, my bad. The 2nd one, the PC, died a few months later, it was a few years old and I had started slowly copying the data over but had not finished backing up before it went. Lucky for me I had a friend who, with a lot of effort, managed to rescue the data from both machines. So if you are wondering how do I back up my computer then I’ll tell you the easy way that I do it (although there are other ways but for someone who doesn’t want to delve into lots of settings this one is simple),

Set Up An Easy Plug and Play Back Up

And so it came that said friend decided that I needed an easy back up facility and bought me a Seagate FreeAgent GoFlex Drive with I think 500 Gb of space. Now I am sure that there are other easy plug and go back up drives available but as I have used this one I wanted to share my experience with it. Basically it has software installed that you can just run and once you have that installed, every time you plug the drive in afterwards it will automatically detect and new or changed files and back them up to the drive.

That is as simple as it is – plug it in and it will back up for you. For someone like me, who never quite gets round to doing a manual backup, it is a godsend. And that was shown to be the case when my 3rd computer, a laptop that was only about 18 months old, also died. Lucky for me that just the day before I had plugged in the backup (I had actually plugged it in to look for a file from one of my old computers that was stored on it but of course as I did that it backed up too).

So really, for less than 100 dollars (on Amazon anyway) you can have a very easy back up system that is suitable for any technophobe to use and really is the simplest back up out there as far as I am concerned. Don’t leave it until it is too late – it is not always possible to recover data from dead computers or can be expensive so save yourself the worry and trouble by getting a back up now.

You can check out the GoFlex drive on Amazon US and the equivalent in the UK below:


I Forgot to Deauthorize My Computer for iTunes

OK, so this happened to me, not just once, but a few times. I had an old PC, 2 old laptops, maybe 3, that became defunct and I either gave them away or ditched them depending on what state they were in. But I forgot to deauthorize my computers in iTunes. Urgh, and now I have hit the 5 computer limit of the number of machines that iTunes will let me play my songs on.

If this is you, and maybe you have already hit 5 and can’t authorize your new machine, then do not fear, there is a way round this. I discovered this when I set up my latest new PC and wanted to load iTunes on there. Luckily it was the 5th machine that I had authorized but I knew that only one of the other machines I still had in my possession so I also knew that there would come a point where I would likely want to authorize another new machine and I wanted to preempt that.

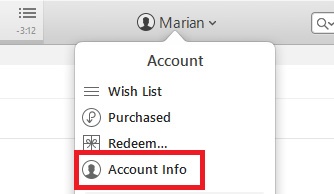
itunes-deauthorizeSo basically what you need to do is to go to your account info page and you can deauthorize all of your computers – yes it is all or nothing! Then you can reauthorize the ones you are actually using.

You just need to enter your apple id and password to get to the account settings page so make sure you know this info.

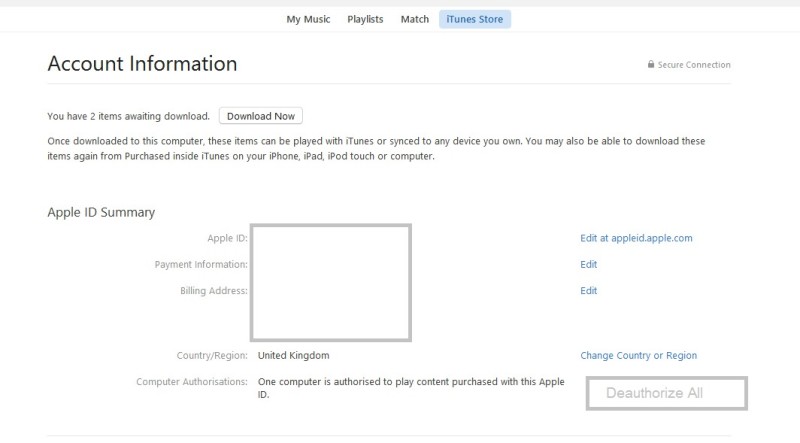
Then you will get the option to deauthorize as shown below. Now you don’t see the actual deauthorize option on my screen shot below (that is why I have added it manually in the place you would normally see it) – because you are only allowed to do this once a year (at least I assume that is why you don’t see the button here – it may also be because I only have one PC authorized right now and I can do that from the store menu, so that may be it.

deauthorize.bmp